Tweed trousers
Inspiration
W hen I was creating these trousers I mainly took inspiration from my most recent trousers - Derby. Although when constructing the fit, silouette and pattern my main inspiration came from older 1930s and 1940s styles where roomier cuts were in fashion. The idea to create an adjustable waistband was already a part of the design to better accommodate for differences in waist measures throughout the day, which had already been tried in the Derby project. However, unlike my most recent trousers these side adjusters overlap the back part to make the adjuster less visible compared to the reverse effect in the Derby project. For the trouser hem I mainly took inspiration from earlier 1930s syle cuffs where a larger cuff was favored as well as double pleats to pull in fabric at the waist. Tweed was chosen for its more casual properties as well as its durability and the pattern is meant to emulate the same fabric patterns worn by gentlemen during the Golden Age of Men's Wear.


Design
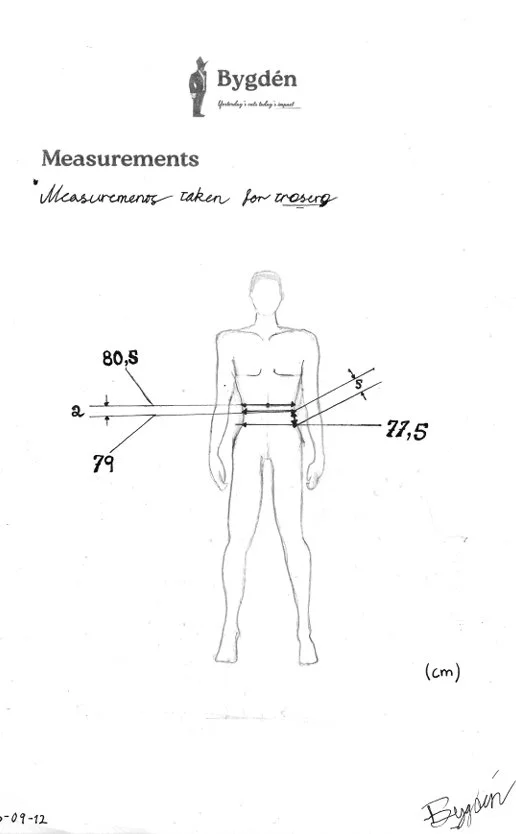
Since this was created for a client I had to make sure the pattern would fit him thus measurements were taken and sketches were made in order to agree upon a good design for the trousers. Although when it came to fitting most work was made using a large front and back and then basted in thus ensuring a proper fit in the end. During the design process detailed sketches as well as calculations, measurements and patterns where created, some examples of these finalised sketches that I made can be found in this post.
Making and Techniques
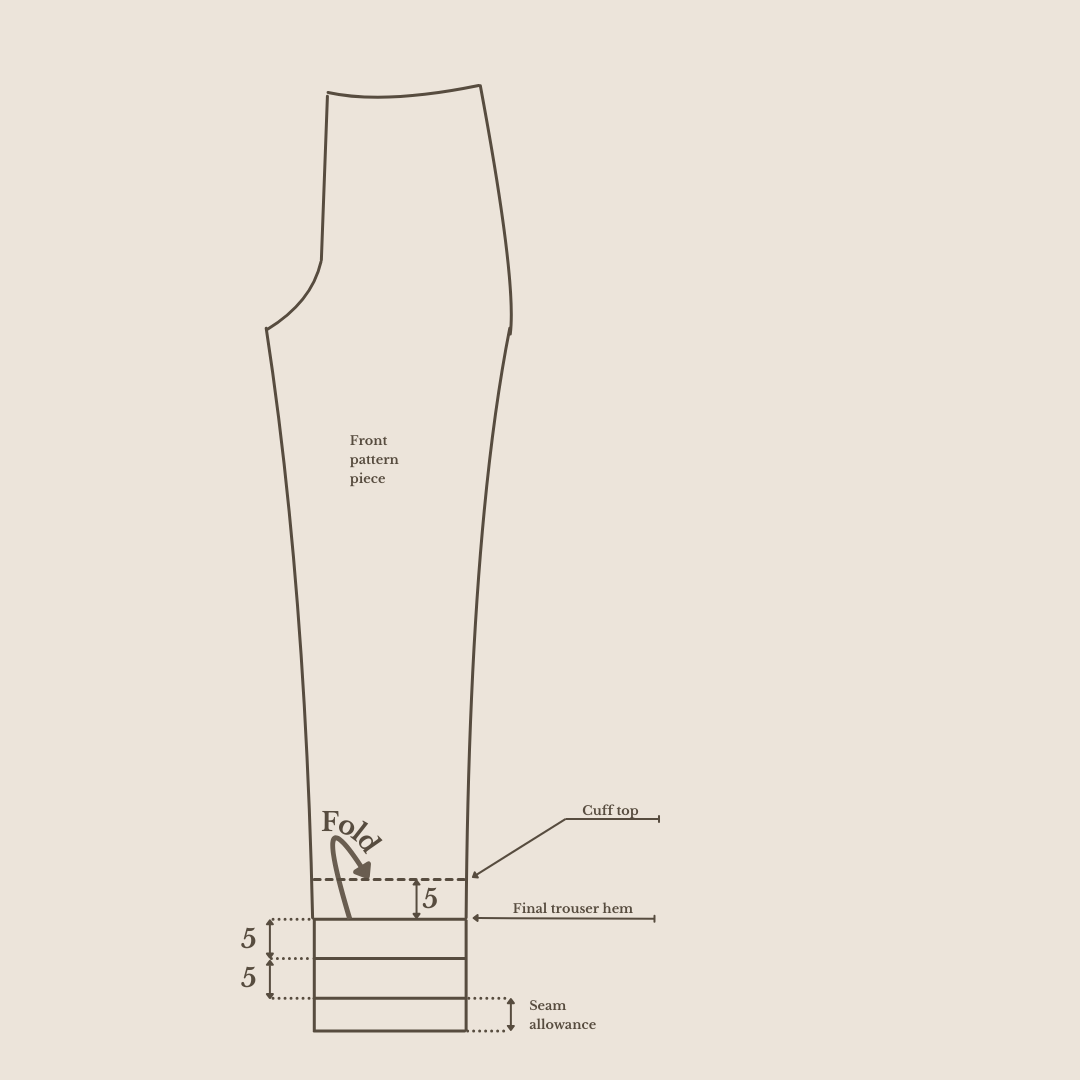
To begin sewing the trousers a pattern had to be cut out of the suiting fabric ensuring the trouser hem had adequate fabric to fold a 5 cm cuff which requires 5×2+seam allowance = 10 + seam allowance. This seam allowance is what will be turned inside the trouser and also must account for overlocking. When turning the cuff one must measure 5 cm from the final trouser hem which is gained by folding the trouser hem on the wearer to ensure a proper fit. This is done at the same time as pulling in the waist with darts, seams and pleats, which can also be done by calculation but a perfect fit is often achieved by simply fitting it to the wearer. I’ve included some images to help visualise the process of hemming a pair of trousers using cuffs instead of a turnup hem. At the end I also top stitched the final hem to finalise the cuffs which is not done traditionally but I did it to ensure a proper straight hem that doesn’t open up with years of wear.


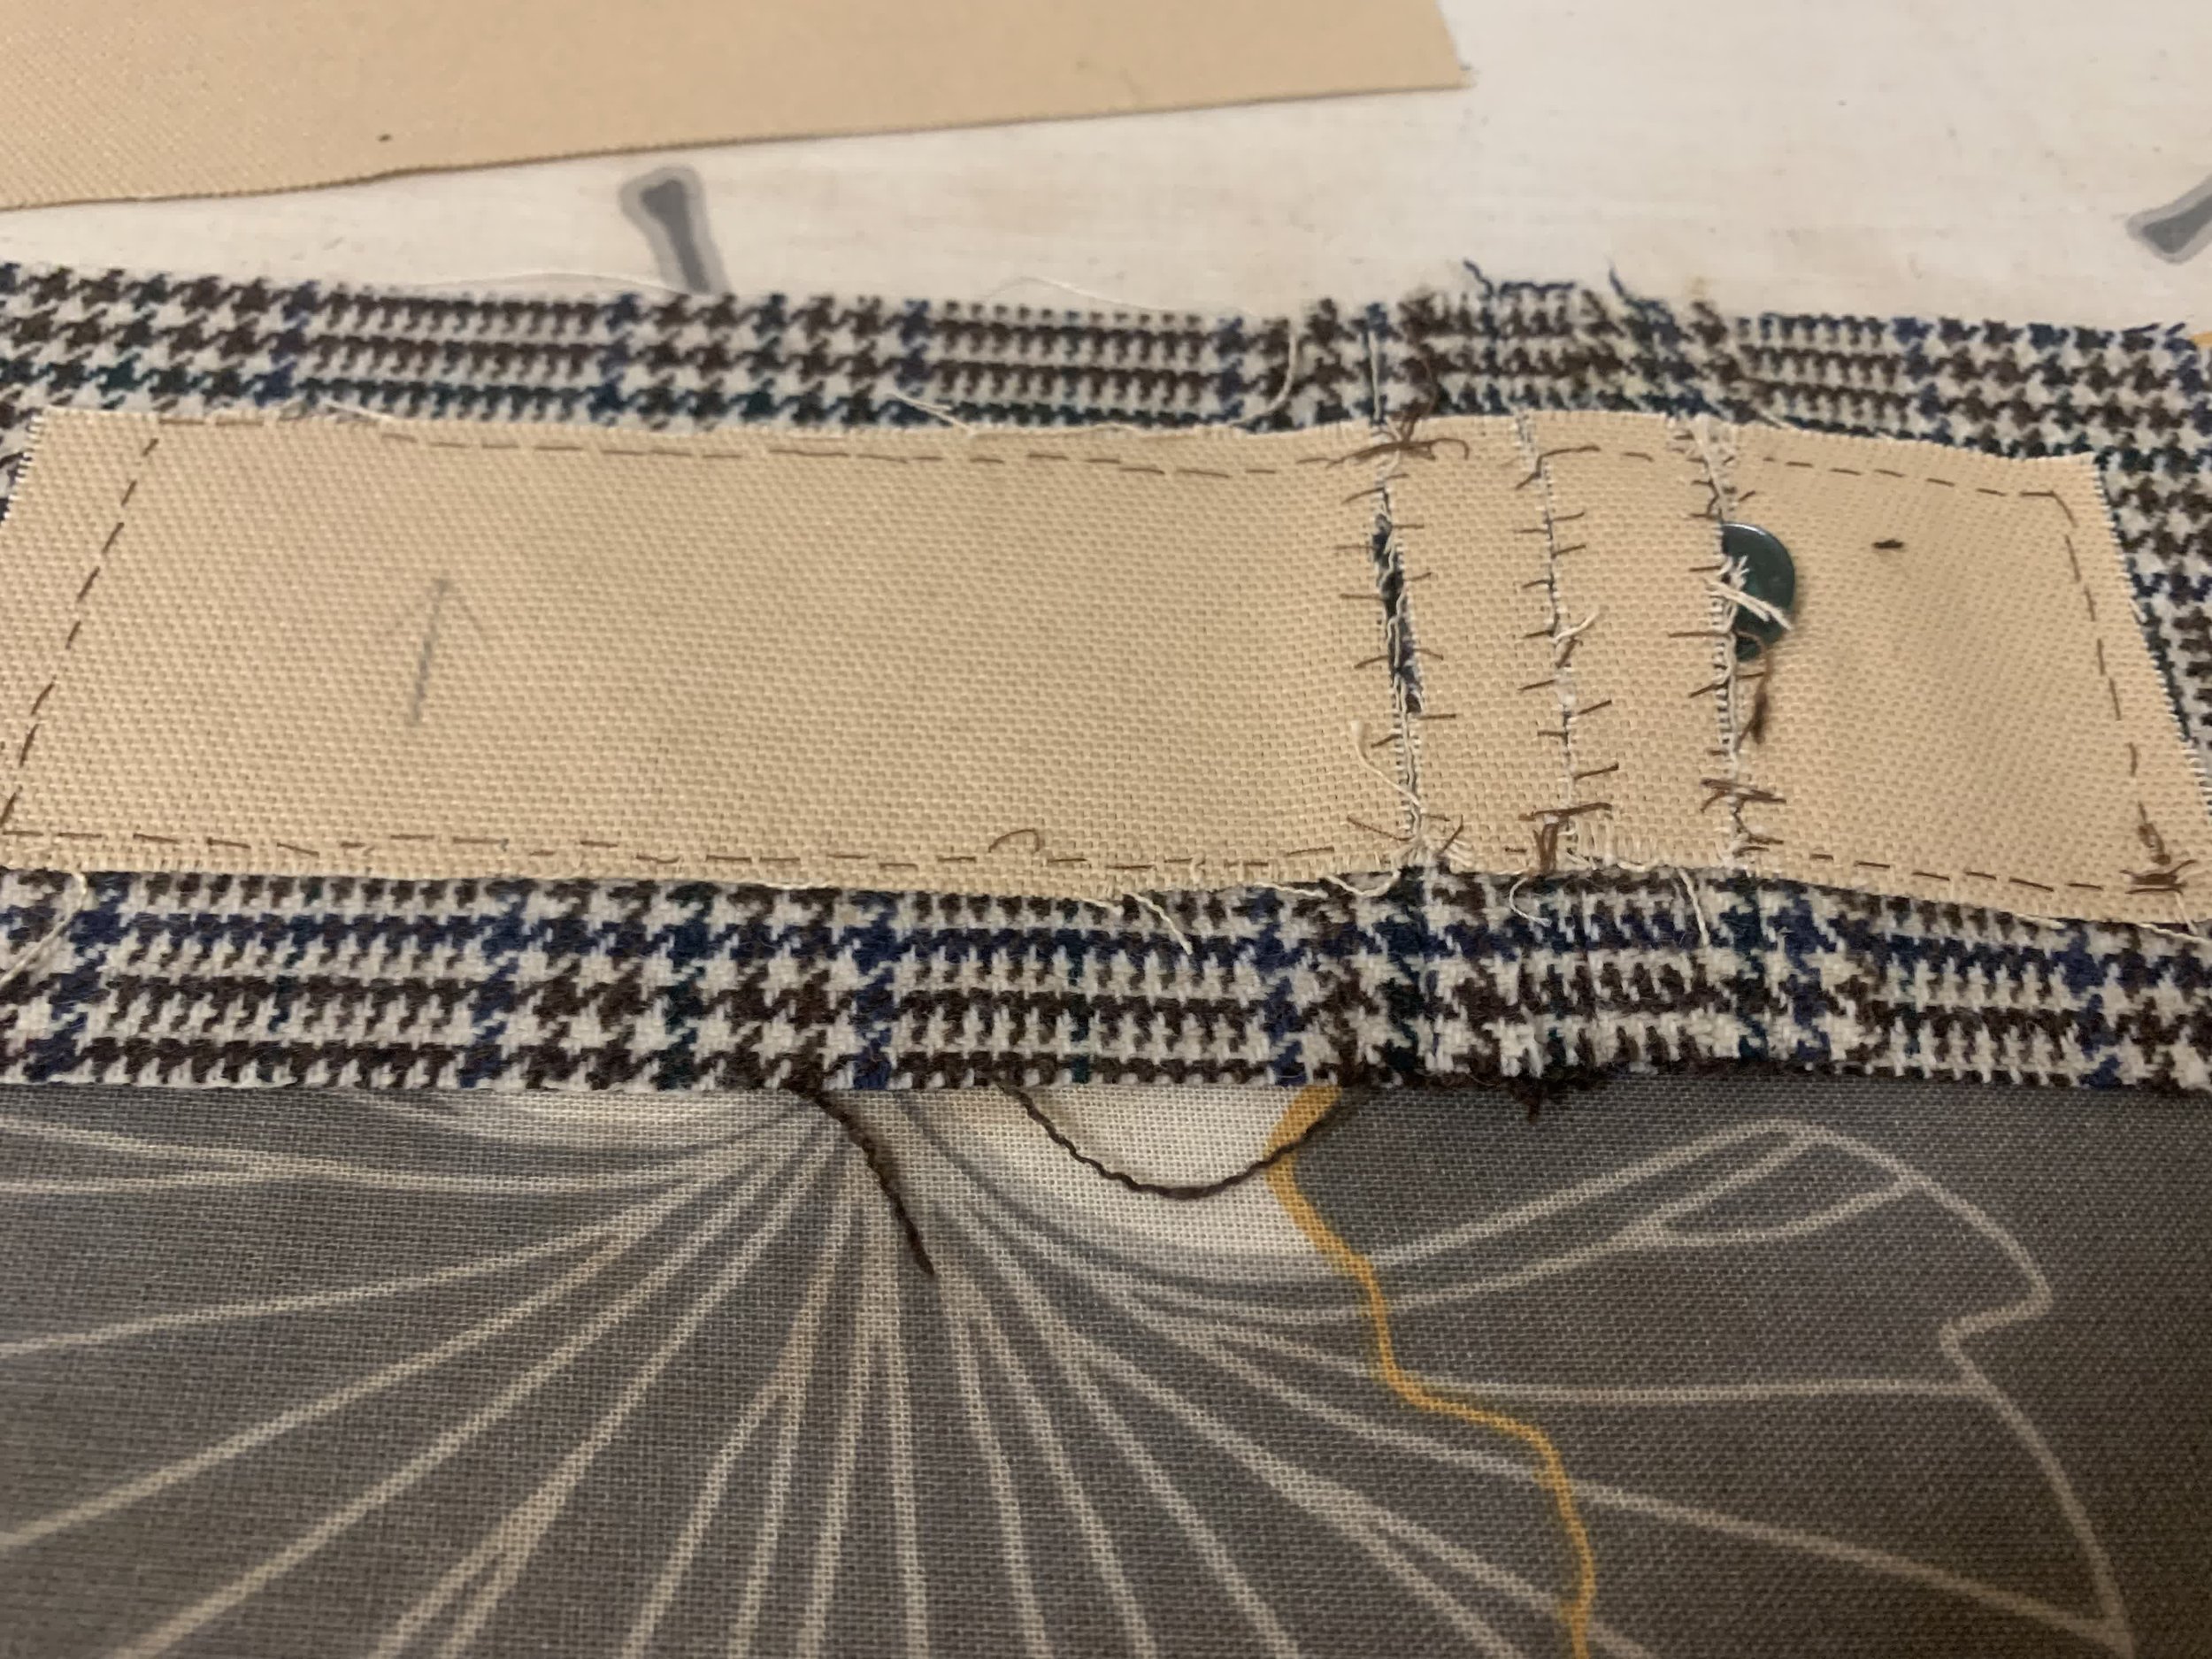


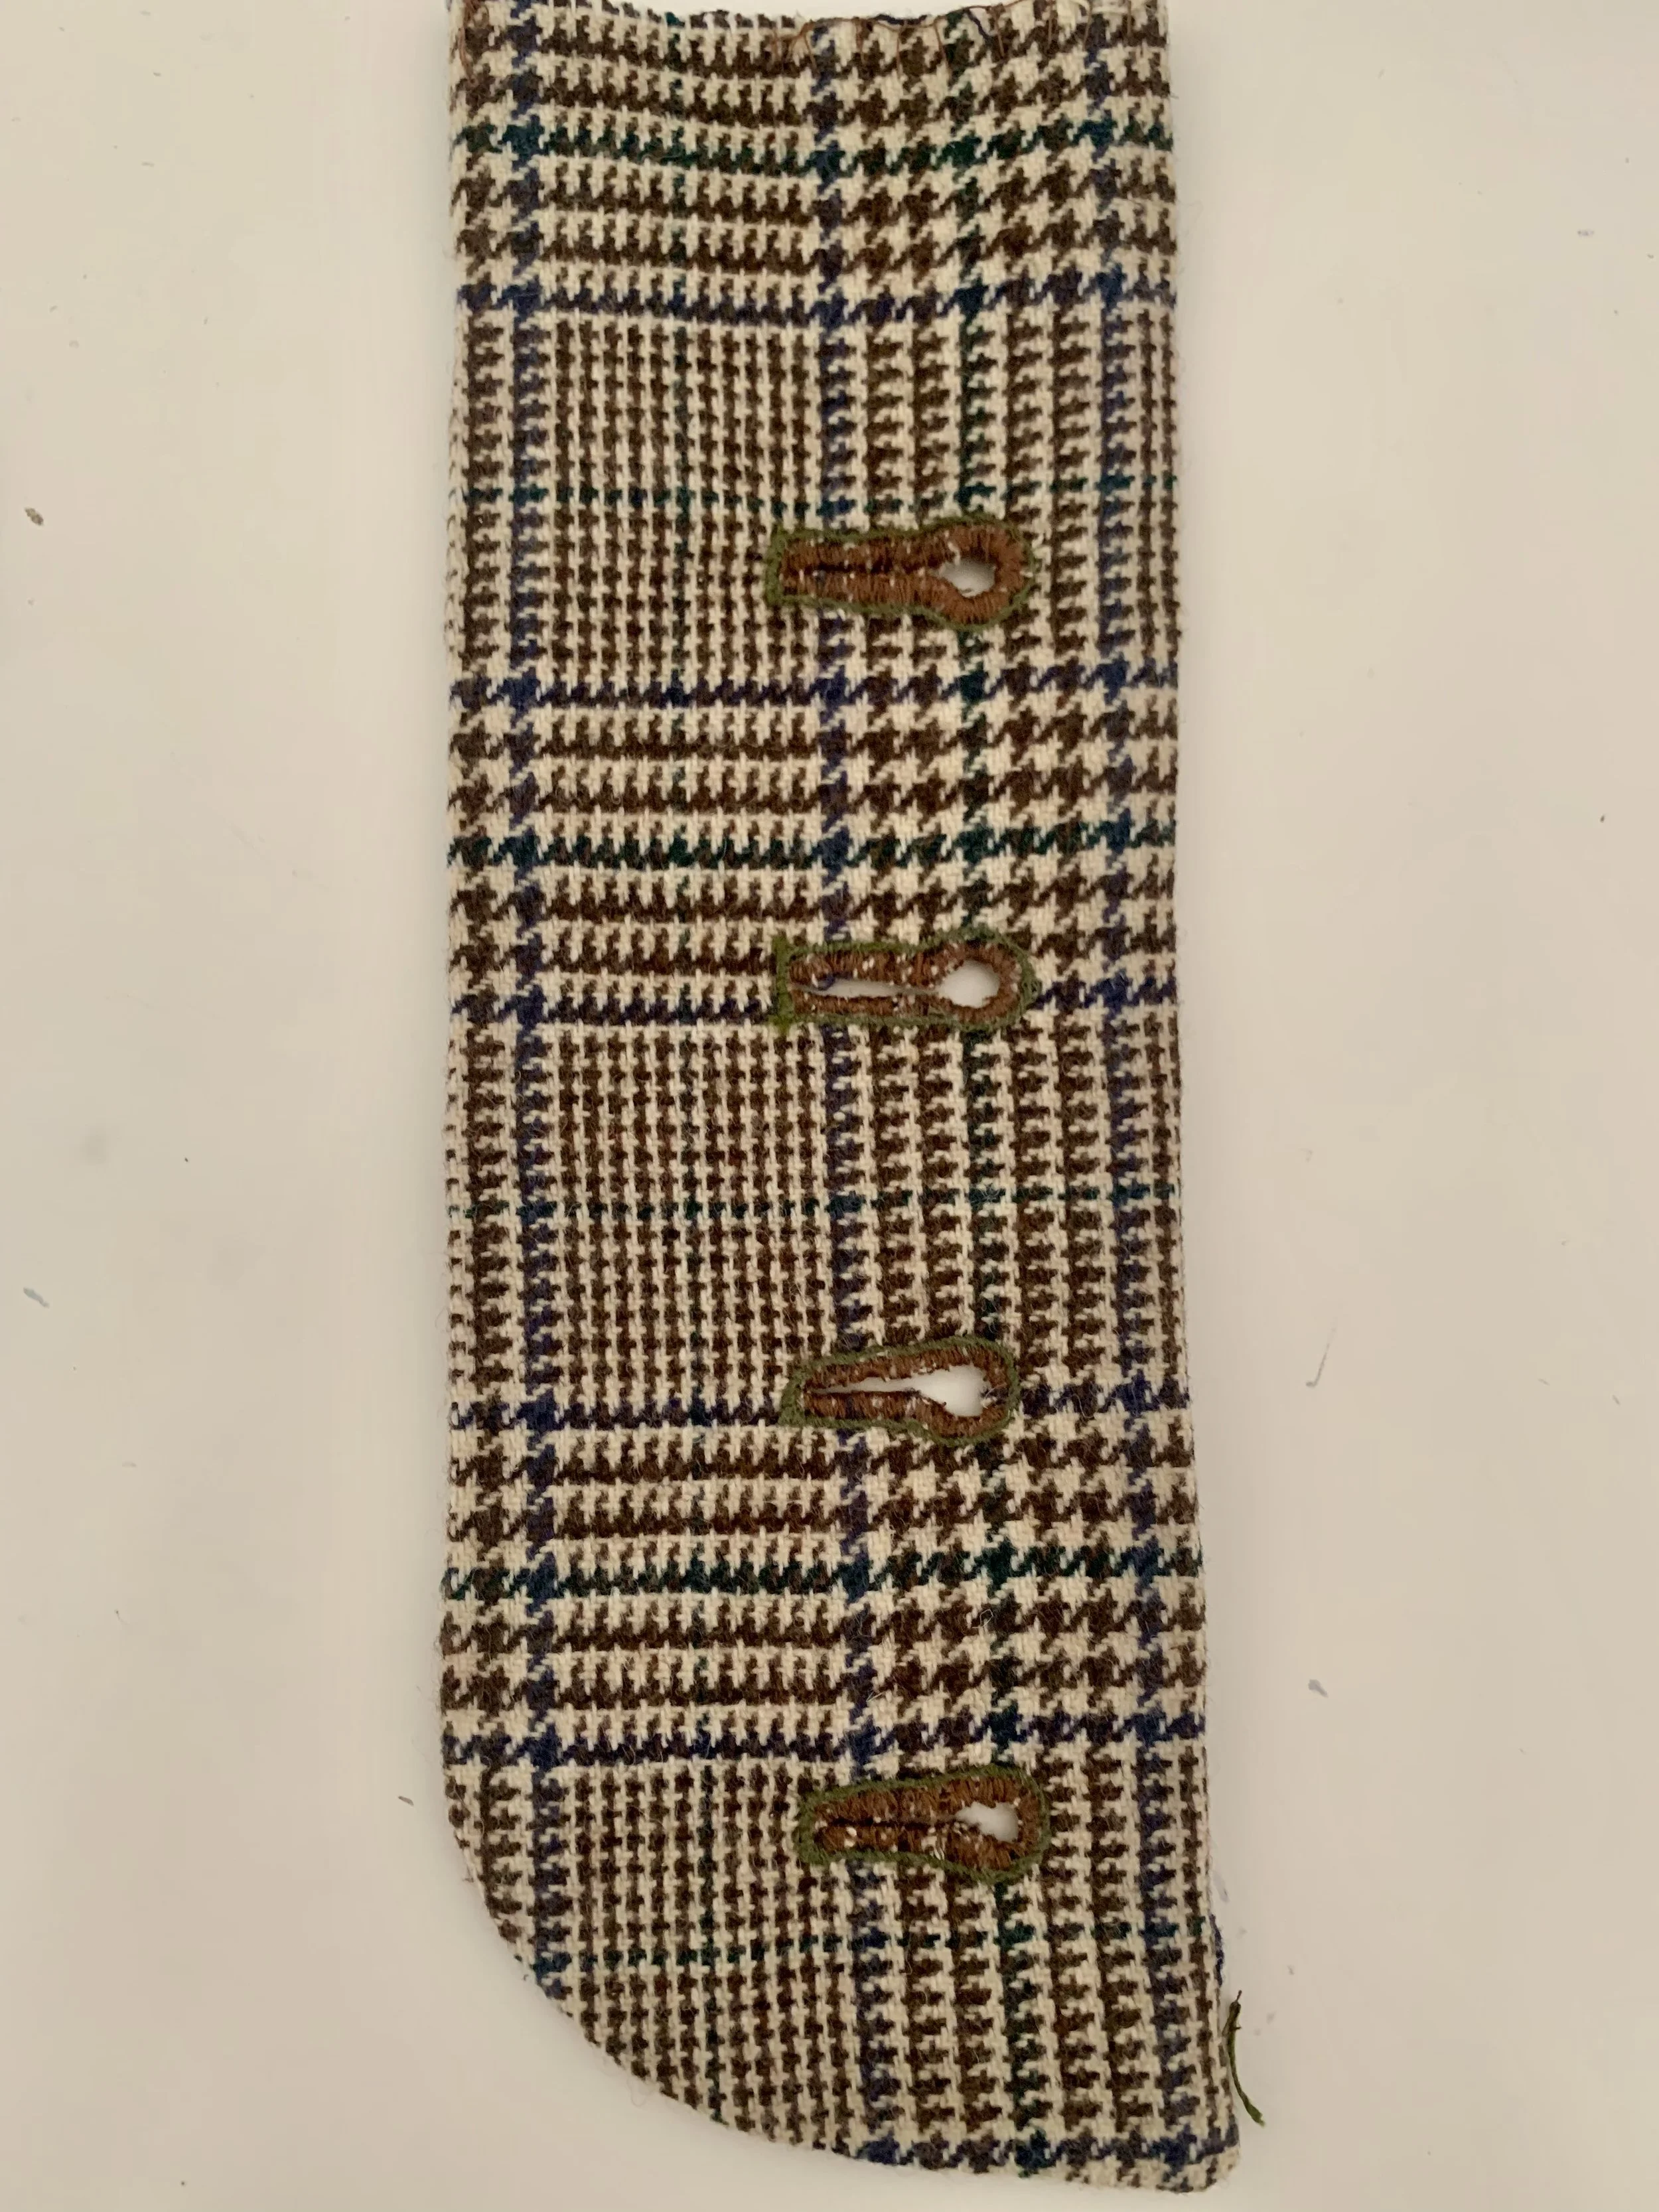


Now on to sewing the actual trousers, for them I began by sewing the side pockets first making sure to leave enough room to finalise a proper trouser rise later on. After sewing the pockets I moved on to creating the final side seams thus finalising the pockets and in this process also creating the fly with proper buttonholes outlined with a contrasting thread (see images below). To create the interior button and buttonhole for a better fit a button was added to the pocket fabric instead of the button fly since larger pockets where a part of these trouser designs and traditionally this is the case as well. Then came the process of sewing the waistband which started by creating the hidden buttonholes which are done by sewing a seam on either side then pressing it open whilst keeping the middle non sewed the same is done to the outside which is then hand sewed in place. For the waistband canvas the buttonholes where created by cutting a straight line and then fitting the canvas after sewing the buttonholes in the suiting fabric in order to avoid any potential bulk that would’ve been the case if the anvas was added before sewing the buttonholes. After this embroidery was done to personalise the trousers which I created by first tracing the design from a screen and then adding thread to the design by first basting it in place and after that sewing carefully using buttonhole stitching to ensure a design that can endure years of wear and tear.
On to the last part putting the trousers together which was done by fitting them to the client and then basting the side and back seams equally to ensure they fit properly, in this same step the waistband was added at the proper rise and the trouser hem was folded and basted. These basted intakes where then noted for future reference and then gradually eased into for the side and back seams and for the cuff the seam allowance represents the amount of room avaiable to use when folding the trouser hem i.e it is used to dial in the final hem and to control if it’s a half break, full break or no break.
Summary and conclusion
In summary, this project has led to a greater understanding for how trousers fit, and helped me dial in a process for fitting trousers to clients in order to ensure a proper fit for them. It has also helped me improve my sewing skills in terms of buttonholes and detailed work and especially to help further my skills in making custom side adjusters as those featured in this project. In the future I hope to create similar projects as this new style and fit was very fun to make and especially the details which truly brought the project to life.


Stay tuned for more posts like this and also on my YouTube channel
Interested in collaborating on a design, contact me here.